Getting Started with STEM in your Classroom

getting_started_with_STEM_in_your_classroom.png

Getting Started with STEM in Your Classroom

If you are not yet teaching STEM in your classroom, the chances are good that you will be within the next few years.

But, what exactly is STEM and how do we go about teaching it?


What Does STEM Stand For?

The acronym itself stands for Science, Technology, Engineering, and Math.

While Science and Math are old staples of formal education, and you may well have come across elements of Technology and Engineering in various other subjects, the main difference in the teaching of these elements under the umbrella term of STEM lies in how they are taught.

However, before we take a closer look at STEM and how it’s taught, you may have noticed a similar acronym floating around containing one extra letter: STEAM.


A Quick Word on STEAM

In recent years, the acronym STEAM has become much more visible.

The A here stands for ‘arts’ and refers to art in a broad manner that includes the liberal arts, fine arts, physical arts, and music etc. It was added to encourage the integration of the creative arts into the STEM subject area.

There’s much debate between educators as to the value of this endeavor. Some argue that STEM should retain a clear separation between the sciences and the arts, while others argue the contrary.

This debate is relatively new and as yet unresolved. As a result, there is no clear consensus on what STEAM would actually look like in the classroom. That said, for the purposes of the rest of this article, we will refer exclusively to STEM, though there may well be ample opportunities to weave the arts into many of the STEM-based activities.


The STEM Curriculum

STEM in the classroom focuses less on the content of the various aspects of the subject, or the acquisition of theoretical knowledge, and more on learning to apply related skills.

STEM focuses heavily on promoting problem-solving and critical thinking skills to help find solutions. It is, above all, a subject directed at the doing rather than just the knowing.

Common elements of the various STEM curricula usually include elements of the following 3 areas:

Design: using design techniques and tools to solve problems and challenges

Application: applying knowledge and skills to solve real-life problems

Integration: drawing on knowledge and skills from a range of overlapping disciplines

Depending on your situation (the type of school, educational system, level of students, management structure, etc) you will need to decide whether you will be teaching STEM as a discrete subject or weaving it into other areas of an already existing curriculum.

Regardless of how the subject is approached, the following general advice will apply to getting started with STEM in your classroom.


Organize the Learning Space

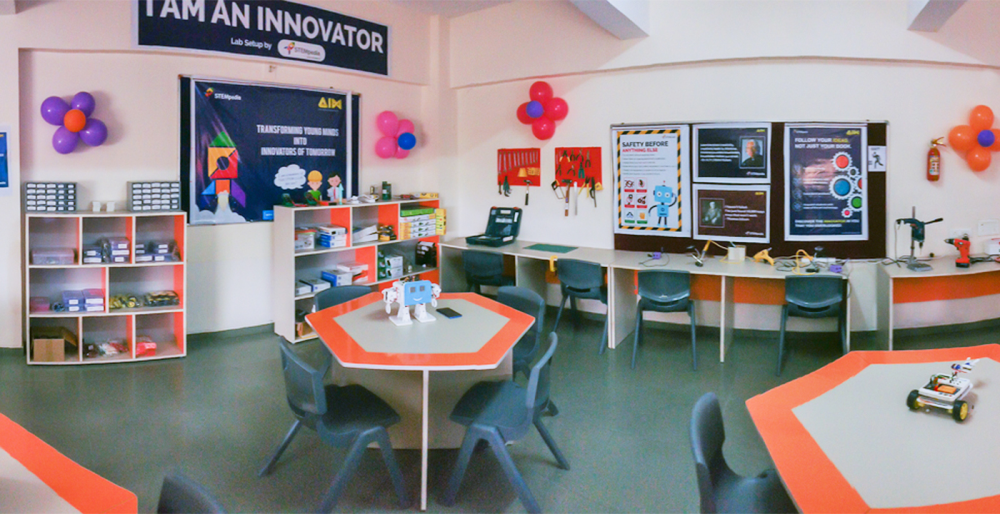
Creating a STEM lab or MAKER SPACE can be both an empowering and an expensive process depending how far you wish to proceed

Creating a STEM lab or MAKER SPACE can be both an empowering and an expensive process depending how far you wish to proceed

STEM is about problem-solving and critical thinking. One of the best ways to develop these skills is through collaboration and teamwork. Before introducing STEM to your students, be sure you have optimized the space available to facilitate group work.

This may mean rearranging tables and chairs. It may even mean removing chairs entirely and grouping smaller desks together to create larger working spaces. These spaces should be suitable for group work and the demands of working on large projects.

In a practical subject such as STEM, safety is a critical factor to consider too. Be sure to have a walk through the area prior to beginning the lesson so that you can identify and eliminate potential hazards.


Encourage Collaboration and Teamwork

Project-based learning is a key element of STEM in the classroom. Teamwork and collaboration are essential elements of ensuring the successful completion of any science or engineering project.

There are a number of ways you can encourage collaboration and teamwork in your STEM lessons. Let’s take a look at some of these:

●       Be sure to embed the importance of collaboration and teamwork into the design of your activities

●       Help students understand the importance of teamwork and collaboration

●       Model directly to the students what good teamwork and collaboration look like

●       Establish clear expectations for working together

●       Ensure all learners are engaged and sharing ideas during lessons

●       Build-in discussion opportunities and stress the importance of consensus building

●       Reinforce the idea of collective responsibility

●       Assign meaningful roles and responsibilities, where necessary

●       Encourage self-reflection and evaluation.


Be Prepared: Plan, Plan, Plan!

Good planning is essential for any effective teaching to take place, but this is especially true if teaching STEM is new to you. The better prepared you are, the more likely the lesson is to be a success.

Of course, we need to maintain some flexibility in our delivery to respond to the unexpected. However, there are six general elements that are characteristic of any good STEM lesson:

●       Ask a question that focuses on a real-world challenge

●       Make sure students are guided by the engineering design process (more on this below)

●       Involve students in hands-on practical inquiry

●       Ensure students work collaboratively

●       Utilize technology and include Science and Maths content

●       Allow for multiple correct methodologies and solutions

If you manage to include these six elements in each of your lesson plans, you will be well on your way to crafting an effective STEM learning experience for your students.


Share Student Learning Objectives

This subject is, to a large degree, about trial and error. It is important that students are not afraid to take chances, make mistakes, and to try new things.

That said, it is equally important that they have a clear focus for their investigations. This means you need to be sure to share objectives with the students at the beginning of the lesson.

You can share your learning objectives orally, but it is often helpful for students to see these objectives written down, whether on the whiteboard or on the top of a task sheet.

In STEM, learning objectives shouldn’t be worded in a way that suggests an expected outcome. Rather, the objective will relate to a central question that is to be explored.

Encourage your students to refer back to this initial problem regularly throughout the lesson to ensure they are maintaining their focus. It is easy at times for students to go off on tangents due to the more open-ended nature of this subject. Be sure to draw them back to task with clearly expressed objectives.


Incorporate The Engineering Design Process

Earlier we mentioned the importance of the engineering design process for guiding students, but what is this process?

The engineering design process is a series of steps that can be followed to help students come up with a solution to their problem.

The process encourages an open-minded approach to problem-solving and works under the principle that failure is a necessary part of the learning process. That is, failures are not mistakes, but a means of refining the efficacy of the solution.

There are quite a few versions of this process out there. Usually, they vary in the number of steps but retain common underlying principles.

A little research will turn up these different variants, but here is a simple 5 step version that is very suitable for use in the classroom.


The 5 Step Engineering Design Process

design-process.png
  1. Ask: Define the problem - without a clear idea of the problem, any further investigations will be unfocused and ineffective

  2. Imagine: Explore possible solutions - brainstorm as a group, then research and analyze the various ideas that arise

  3. Plan: Choose a solution to investigate - identify the resources required and outline proposed methods of investigation

  4. Create: Create something - follow the plan and try things out, what went well and what did not?

  5. Improve: Redesign as necessary - evaluate prototype, revise plan in light of information and knowledge gained.


Integrate Technology

Technology, of course, puts the T in STEM and it is essential that it is integrated into your STEM lessons. Like the other elements of the subject, the application of the skills of technology will be applied to find a solution to the identified problem.

When considering where exactly to integrate technology, the steps of the engineering design process above provide a good starting point.

When planning your lesson, consider what technology is available for the students to use and how it can best be employed at each of the 5 steps of the process.

For example, at Step 2 can students use the internet to research the possible solutions or to help analyze the various ideas?

 Or, when working on Step 3, can students use digital models or simulations to help investigate possible solutions?


5 Simple STEM Activities

There is no end to the number of activities that can be designed to incorporate the teaching of STEM principles in the classroom.

One of the best things about this subject is that most activities are easy to adapt and differentiate for varying ages and abilities.

It is also worth noting that when looking for STEM activities to do with your students, it is common to come across projects that have prescribed outcomes. This is true especially when the activities are aimed at younger students.

Remember, for STEM to be really meaningful there should be room for some open-ended investigation too.

A good way to test whether there is room for open-ended investigation in a project is to consider whether or not the engineering design process can be applied. Where students are working towards a predetermined outcome, there will be no room for the use of this process.

In the following section, we will take a look at 5 simple activities that can be easily adapted to suit the specific learning needs of your students, while also providing a starting point for the creation of your own ideas for STEM lessons.


1. Design a Cell Phone Stand

This activity challenges the students to design and build a simple cell phone stand using the engineering design process. Students will need a cellphone and an assortment of materials to build their designs (card, rubber bands, paperclips, lollipop sticks, glue, tape etc). Task your students with creating a cell phone stand that is functional and convenient and then compare the different designs and prototypes that emerge.


2. Build a Baking Soda Rocket

Likely your students will be aware of the explosive potential of baking soda and vinegar from making volcanoes in their kindergarten days. In this activity they will harness the same chemical reaction to power their own rockets. The challenge here is for the students is to select the best available materials to construct an aerodynamically designed craft that will fly as far as possible.


3. Blow the Best Bubbles

In this activity, students will explore which mixtures produce the best results for blowing bubbles. Provide the students with a range of options to add to water, including washing up detergent, glycerin, and light corn syrup. They’ll also need measuring cups and something to make the wands from, such as pipe cleaners for example. Students explore what ingredients make the best mixtures and in what quantities each ingredient is required. As an extension, you may challenge students to explore the best materials and shapes for making the wand too.


4. Build a Robotic Hand

Challenge your students to research the mechanics of how hands work and use the acquired knowledge to build their own robotic versions that are capable of picking up light objects. Students will learn how bones, muscles, tendons, and joints work together and come up with ideas on how to recreate artificial versions of these. Groups will need to experiment with a wide range of materials, so be sure to have a wide selection of resources available for their experimentations. As a starting point, be sure to have drinking straws, string, tweezers, modeling clay, cardboard tubes, rubber bands, and paperclips available.


5. Build the Strongest Bridge

Choose two platforms that the bridges will span. This could be a space between two large books, two tables, etc. Students should investigate various designs and shapes for their bridges and explore the load-bearing properties of various materials. The strongest bridge will span the gap and be able to bear the heaviest load. This activity can be a great way to instil a competitive element into a lesson where groups vie against each other to build the strongest bridge.


Go Get Started with STEM!

These are just a few simple ideas from which to build out a STEM focussed lesson for your students. It should be apparent that the possibilities for STEM-based investigations are endless.

Remember though, no matter what the focus of a classroom STEM investigation is, the underlying principles at play will involve students overcoming their fear of failure in favor of the rewards of trial and error.

A classroom atmosphere that encourages curiosity and courageous exploration is the one key essential.

The Best Coding Games for Kids

coding_games_for_kids.png

Best Coding Games For Kids

In this age, where our society heavily relies on technology, coding has become an essential piece of employment qualifications. And if you wish your children to have a successful career, then it is best to give it a quick running start.

Coding for children does not merely help improve their writing and mathematical skills because it also supplies them crucial abilities in life and, ultimately, in the workforce.

Why should we become aware of the significance of coding in our kids? There are several reasons for it, but the most crucial factor for that is, if they know how to code at a younger age, it significantly increases their chances of getting their dream job in the future.

Why is coding a vital skill to learn?

Knowing the basics of programming is a vital skill not only for adults but for children as well. Specifically, for the young ones, learning the fundamentals of coding in the early stages of life provides a massive benefit. 

One advantage of this skill is that when students are capable of creating simple websites and games, it will help them polish their logic, plans, and problem-solving skills. Besides, it also enables them to formulate ideas and show creativity in uncommon ways. That is why coding is indeed a useful tool for learning for children.

As we observe how the world develops, it is evident that coding is a highly essential skill to have. Why? Because there is a rising number of institutions that rely heavily on computer code, not just the sector in technology.

A student who knows how to code at an early age will possess an advantage in life. This advantage means more opportunities in employment waiting for them in the future. Regardless of which industry they will settle in, be it in the health sector, retail sector, finance sector, or others will never be a problem because our society currently revolves around technology.

So, if you have a child who spends a lot of time playing mobile games, why not incorporate coding into it? It is an excellent way for them to learn how to code while having fun at the same time. As kids expose themselves to technology, it will surely help them become a vital part of huge corporations as they grow up.

How can you teach your child to code?

This question is probably the first one an interested parent will ask. Well, many parents are as clueless when it comes to coding as the others, and that is particularly normal.

The most beneficial component of programming is that we can learn it at any period. Although the retention of various languages can be quite hard, especially for late adults, it can still turn out to be an excellent experience.

If you are going to ask about the most effective approach for your kids to learn to code, then the answer is for you to learn it with them.

You can stimulate interest in your children if they notice you doing the same.

So, if you become interested in coding and put in a little effort to learn it, chances are your children will follow.

To help you start, here are some top coding applications for kids.

Bee-Bot

Available on iOs and ANDROID

Available on iOs and ANDROID

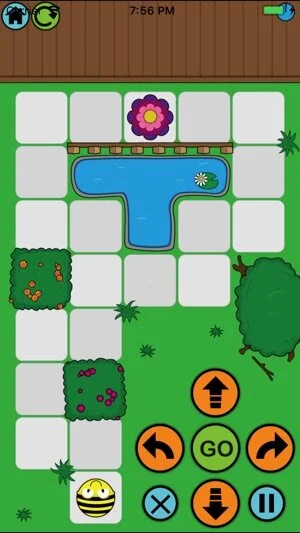
This app is available on Google Play and the App Store. The Bee-Bot floor robot inspired this coding application, which now enables the children to learn the fundamentals of programming at various levels quickly.

The little ones who learn to code may entirely use this application to enhance not their problem-solving skills alone, but also their programming skills. Bee-Bot has 12 levels encouraging progression in total. Each level is time-bound, and the quicker you complete the stage, the more stars you acquire.

It enables children to enhance their skills in directional languages together with programming through the various sequences of backward, forward, left, and right 90-degree turns in every level. 

The progression within this game will allow students to improve their knowledge and their problem-solving abilities through encountering difficult challenges throughout the various aspects of Bee-Bot.


Daisy the Dinosaur

available on all major platforms

available on all major platforms

This application is suitable for ages 5-8 and is free to download. Daisy the Dinosaur serves as an excellent foundation for programming or to assess your child’s curiosity in the topic. Kids can program Daisy and in the process, learn some fundamental practices of programming. 

Daisy the Dinosaur has a couple of sections for your students to explore, one is the free-play mode, and the other is challenge mode. 

In the free-play mode, juniors can explore with commands to see how Daisy will move as an outcome of their program. Meanwhile, in challenge mode, kids will challenge themselves to solve a presented problem.

They need to use the given commands to finish the challenge. Apply the smooth drag and drop symbols to make Daisy the Dinosaur move. This Gaming application sets the foundation for learning the fundamentals of programming.

The content in this application is not huge, but sufficient enough for a free app. 

Code Adventures: Coding Puzzles For Kids

available on ios and android

available on ios and android

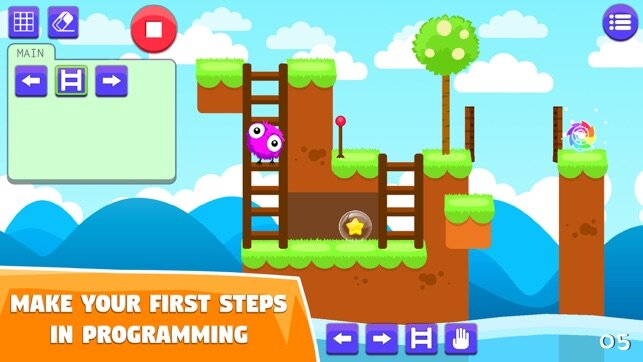
This remarkable app is ideal for ages 6 to 8 that concentrates on child-friendly computer coding puzzles.
This game features exciting puzzles while learning how to code, loveable characters, funny sounds, engaging visuals along with around 30 puzzle stages.

The main goal of this game of puzzles is to help Aurora go home by finishing the 30 stages of challenges. Also, this app works through different levels, which include the basics, functions, and repetitive control structures (conditional loops).

Students will have to set the commands into the correct order, which indicates a practice in sequencing ability. Besides, they will find the necessity to repeat the commands to help move the character around, as each movement hardly takes it one block in any direction.

The app slowly introduces different puzzle details such as ladders, movable bridges, flying platforms, and portals, which makes the programming even more enjoyable.

Children will solve tricky puzzles while learning how to code. It also grants an excellent opportunity for a family to bond together while stimulating the child’s curiosity in STEM subjects.

Kodable

avaialble on ios and android

avaialble on ios and android

This coding application cuts down computer science into the fundamental thoughts that children require to build a stable foundation in life. 

Kodable gives materials that concentrate on subjects ranging from communication and social-emotional knowledge to the real influence of computer science in the world.

This application hosts lessons for coding and games for children between 5 and 10. The main objective of Kodable is to assist elementary school educators in bringing programming basics into the classroom in the form of a game. 

While Kodable is indeed useful in the classroom setting, parents can also take advantage of this app to teach coding to their kids in an engaging and entertaining method. The design of the teaching guide of this app is so excellent that even people who have no experience in coding at all can also use it.

Kodable applies the sets of principles and processes of JavaScript, which makes it an outstanding source to learn to code for beginners. 

While this app focuses on younger ages, older children can take classes regarding JavaScript too. It will lead learners through the concepts of programming using various challenges and games, such as maneuvering a labyrinth. 

Kodable is one of the best apps for coding because it also enhances vital skills such as problem-solving abilities, social-emotional learning, decision-making abilities, communication skills, and a lot more.

ScratchJr

available on all mobile platforms and devices

available on all mobile platforms and devices

This game is a free coding application for young children.  With the help of ScratchJr, kids ages 5 to 7 can program their games and stories. While having fun, children will develop their skills in problem-solving, project designing, and will be capable of expressing themselves creatively.

Students snap together blocks to help make the characters move, sing, dance, and jump. They can also modify the characters in the app using the paint editor, add their voice, and even add their photos, which can truly develop their imagination and creativity.

Furthermore, as children learn how to design projects and solve problems while playing the game, they can also enhance their abilities in sequencing, which is an essential factor throughout life.

To Conclude

A lot of people believe that teaching students to code is almost an impossible task, and they are correct. However, if you introduce yourself in these coding apps and by recognising the benefits of coding in your children, then you would probably change your mind.

Teaching the little ones how to code will truly be advantageous for them, particularly later in life. Not only that, learning how to code at an early age would grant them a skill that they can utilize throughout their lives, but it would also prepare them for several new careers that will arise. 

This effect is a result of the rising inclination of the current generation towards technology, which makes it more reasonable for every parent to introduce coding to their kids.

How to build and outdoor classroom at your school

We often think of a classroom as essentially... A room.  But there are days when mother nature offers far more enriching learning opportunities in the open.

And the effort and expense to build one of these in your school is minimal.  It is really surprising to think that every school doesn't have one when you consider the opportunities it offers students and teachers to break the mold every now and then.

I came a across these simple plans from kaboom that outlines one idea but I am sure that you could adapt this to suit your needs.  You can download them here.

I'd love to hear from anyone who has had any experience in this field and could share their insights. 

Simple to make Halloween Jack-o-Lantern Jars

The spooky season is almost upon us, and these Jack-O-Lantern Jars are a fantastic way to decorate your classroom for Halloween.  The kids will love customizing their own designs and watching them glow in the darkness of the night.  With a few simple materials you can add a special spooky glow to your Halloween night!

For additional Halloween craft ideas, check out the Halloween Express ultimate guide for Halloween crafts.

Another great idea from Belinda

What you will need...An assortment of jars, coloured tissue paper, PVA glue (or  a glue which will dry clear), a paint brush, scissors, black paper, tea lights or LED candles.


Step One...Choose one of your tissue paper colours and cut out some strips.  For the pumpkin jar I used about 8 strips (2 x 10cm).  Of course the amount needed will depend on the size of the jar.

Step Two...Grab your strips, jar, glue and paint brush and prepare to stick your tissue paper in place.

Step Three...Cover your jar with PVA glue, and start sticking your strips on, as you cover your jar you will need to continue to add glue to ensure the overlapped pieces stick.


Step Four...Once you have completely covered your jar with tissue paper coat with another layer of glue.  Tip...Be sure to only have one to two layers of tissue paper on your jar, too many layers and you will loose the glow effect.

Step Five...Take your black paper and cut out a design to fit your jar...be creative!

Step Six...Glue your black paper design onto your jar and apply another coat of glue over the top of the black paper to ensure it stays stuck down and to give it a shiny appearance.

Step Seven...Carefully insert your tea light or LED candle to see the full effect of your Halloween creation.  Remember to always treat fire with caution!

The most fun way to teach computer science to kids

Computer Science Unplugged is my find of the week.  It houses a collection of free learning activities that teach Computer Science through innovative games and puzzles that use cards, string, crayons and lots of fun and action.

CS unplugged introduce students to underlying concepts such as binary numbers, algorithms and data compression, separated from the distractions and technical details we usually see with computers.

CS Unplugged is suitable for people of all ages, from elementary school to seniors, and from many countries and backgrounds. Unplugged has been used around the world for over twenty years, in classrooms, science centers, homes, and even for holiday events in a park!

Check out the video to see how it can be used in the classroom.  And be sure to download the excellent lesson plan booklet.       Click here to access


Name games for teachers and students

I will be the first to admit that I am terrible with learning people's names and find it difficult to find strategies that are effective.  Give these three simple games a go with your students and you'll all be on  a first name basis in no time.  Once again thanks to Michael Ramiko for submitting these three games in to make this process a little easier.

The small difference

On the board draw a seating plan of the room and get the class to copy it. Each learner round the room then says their name and everyone else writes it down at the correct place on their plan. Ask the class to study the names for 2 minutes, then put their plans away. Ask your first volunteer to leave the room - and while they're out, two other learners change places. When the volunteer comes back he /she must notice and name both students that have moved. Repeat the game a few times with different volunteers. After a few turns, make the game more difficult by changing two pairs at a time.   

Put up a mixed-up spelling of your own first name on the board - e.g. I might put up "Mij". Now, ask them to write an anagram of their own name. Collect these in and write them all up on the board. Every student now tries to write down all the original names. When finished they can check by walking round the room, meeting people and finding out if they have each person's name correctly.

People bingo

Each learner draws a large 3 by 3 grid (i.e. 9 squares). Slowly read through all the names on the register (spelling difficult names). Learners must randomly select 9 of these names (of people they don't already know) to write into spaces on their grid. When everyone has a full grid the learners walk around the room, find their nine people, chat a little and make some notes about each person. Afterwards, play "bingo" by calling out names randomly - students tick a name if they have it on their own grid. For each name ask the class to indicate who the person is and tell you some things about the person. When someone completes their grid with nine ticks - they win. (But you could always play it again!)

Spy

Prepare a set of small cards - one for each learner. On three quarters write "true"; on the others write "false". Distribute them; students must not let others see their card. Learners then stand up and mingle, meeting people and talking. When asked questions, anyone with a "true" card must give true answers; anyone with a "false" card must lie (except about their name), inventing false life stories. Afterwards, form small groups of 4 - 6 people. Each group should try to work out who was "true" and who "false", writing a list identifying all suspected "false" people. Finish up with a whole-class stage when the lists are read out and the truth is revealed. Groups get 3 points for each "false" person correctly spotted - but minus 3 for anyone incorrectly identified.

Simple but effective icebreakers to start the school year.

Although you may be a new teacher to a group of students, most of them have already worked together for years and know each other all too well. The new teacher may be the only one who needs to learn names. And, even if the teacher and class have all worked together before, there may still be a need for some activities to welcome everyone back and mark the start of the new year.  Here are a few that might be useful. 

Be sure to check out our list of ten great activities to break the ice for more ideas

Fibbing to the teacher
When a teacher is new to a class that already know each other, try this game. In groups of 5 or 6, the students should carefully prepare to introduce members of their group to the teacher. Everyone should introduce another person (not themselves). They should say names and something about their interests, home area, personality etc. All the information must be true except for one person in each group – for whom every single thing must be untrue. Allow plenty of time for careful preparation, after which the teacher should listen to all a group’s introductions (while learning useful names etc) and decide which is the untrue one. Warn all students that they must be careful not to give away the fib by laughing, sniggering etc.

The virtual party
Arrange an imaginary “welcome back” party. Ask everyone to stand in one part of the room. Designate another section of the room as the party room and show them where the front door is. Appoint a host / hostess or two and brief them on how to welcome guests. Be a host yourself too. Then encourage students to “arrive” at the party one by one, or in small groups, (ringing the imaginary door bell) and once there, mingle, chatting in English, catching up on news. Serve imaginary drinks and snacks. Students initially tend to react to this simulation with some suspicion (feeling it is a bit silly to hold imaginary drinks etc) but it usually takes off very well once they get into it.

Setting year goals
It is all too easy to simply launch into teaching from a new coursebook assuming that the class is automatically with you. However it is worth taking time to make sure that students are really clear about why they are learning and about what they want to get out of it. A simple way to do this is to ask them to make brief notes in answer to questions you ask. Make sure you allow enough thinking time. Students can then meet up in pairs or threes and compare thoughts. Possible questions: Why do you think English will be useful to you in the future? What is the most important area you want to improve on this year? What types of activities do you enjoy most in English classes? What advice would you give to your English teacher? What do you want to be able to do by the end of the year that you can’t do now?

Thanks for Michael Ramiko for submitting these ideas.  We'd love to hear some of yours.

How to teach equivalent fractions to elementary students

Equivalent fractions are fractions that represent the same value or fractions that represent the same part of an object.  Using various examples, this unit will assist students in grasping the concept of equivalent fractions. Pictures and diagrams are included that will greatly enhance
understanding to your students.

Please use the slideshow above to assist you in teaching equivalent fractions

This lesson was submitted by Piyush Bhakar - If you wish to sell us your lesson plans take a look here.


Topics covered in the given unit are:

  • Definition
  • How to find equivalent fraction
  • Methods to find out equivalent fractions
  • Examples
  • Comparison of equivalent fractions